When the temperature is rising outside, a ceiling fan is a guaranteed way to cool yourself down! However, when your fan isn’t functioning properly, you’ll feel more frustrated than anything else. Often, a faulty capacitor can negatively impact the performance of your ceiling fan. If you’re trying to determine whether or not your ceiling fan capacitor is working, this article is for you!
There are many signs that indicate a ceiling fan’s capacitor is not working. For example, if your ceiling fan is spinning slower than usual or certain speed settings aren’t working, the capacitor is likely to blame. A fan that is able to be manually started is also a sign of a faulty capacitor. It is possible to test the health of a capacitor using a multimeter.
In this article, we’ll break down everything you need to know about your ceiling fan’s capacitor – from what it is to the various signs it’s no longer working the way it should. Once we’ve done this, we’ll explain how you can use a multimeter to test your ceiling fan’s capacitor. Let’s get started!
What is a Ceiling Fan Capacitor?
The capacitor is crucial when it comes down to the components that make up your ceiling fan. The capacitor, located within a black box in your fan’s switch housing, allows your fan to start up. Not only that, but your fan’s capacitor enables the blades of your fan to rotate.
When you turn on your ceiling fan, you await that instantaneous whirring sound you’ve come to expect. That wouldn’t be possible without a capacitor, which essentially stays energized for as long as you leave the fan running. Ultimately, this allows your fan to perform the way it should.
The capacitor is able to do this by absorbing excess power. This excess power stored in your fan’s capacitor is then used to maintain a consistent level of power when you’re operating your ceiling fan. Basically, the capacitor supplements the power your fan needs to operate optimally.
Furthermore, without getting too technical, your ceiling fan’s capacitor is responsible for generating a magnetic field or torque. In turn, this allows the ceiling fan’s rotor to turn in the direction of the produced magnetic field.
From the above, it is clear that capacitors play a crucial role in the functioning of your ceiling fan. Therefore, when your capacitor is damaged or faulty, your fan will not perform properly. The next section of this article will highlight the five main signs that your fan’s capacitor isn’t working properly.
5 Signs Your Ceiling Fan Capacitor is Faulty
If your ceiling fan hasn’t been performing well or at all, a faulty capacitor could be to blame. Keep reading as we break down the five signs that your ceiling fan’s capacitor is faulty and needs to be replaced. Let’s take a look at the signs you should look out for!
#1: Your Fan Can Manually Start
Often when a fan doesn’t turn on with a switch, it’s possible to start it up by manually pushing the fan’s blades by hand. If your ceiling fan can start up manually like this, it’s a sign that your capacitor is struggling with a phase shift and needs to be replaced. Replacing the capacitor will allow you to turn the fan on with the switch.
#2: Your Fan Is Running Slowly
Have you noticed recently that your fan has been running slower than before? You might not notice this immediately but, when you do, it’s likely a sign that your fan’s capacitor is faulty. If you notice your fan spinning slower than usual, it’s worth testing the capacitor with a multimeter. We’ll look at that in a moment!
#3: Not All Fan Speeds Are Working
If you’ve noticed that certain fan speeds aren’t working (or are turning slower, as discussed above), it’s more than likely a sign that your fan’s capacitor is no longer working the way it should. As mentioned earlier, the capacitor is responsible for phase shifts. Therefore, when certain speeds are not working, the capacitor is typically the culprit.
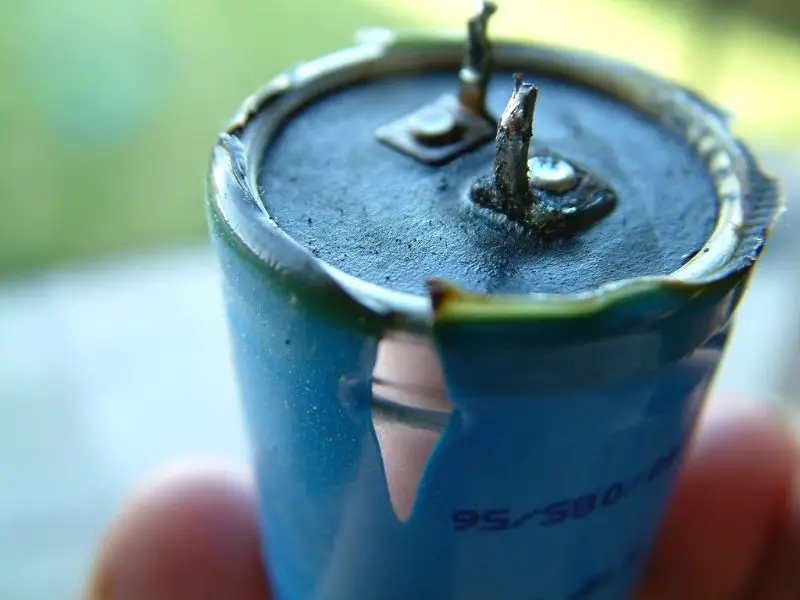
#4: The Capacitor’s Case is Burnt
One possible explanation for your faulty ceiling fan capacitor is that it has, quite literally, burnt out through overheating. To assess this, you’ll need to take a look at your capacitor, which is located inside a black box within your fan’s switch housing. If you find the capacitor or its housing appears burnt or melted, it’s a clear sign that your fan’s capacitor needs to be replaced.
As we discussed earlier, your capacitor absorbs excess power. However, this process can often result in the buildup of heat within your capacitor. For this reason, excessive heat is a prevalent reason for damaged capacitors, especially in ceiling fans.
#5: Your Capacitor Gets a Bad Multimeter Reading
When you believe your ceiling fan’s capacitor is to blame for your fan’s performance or lack thereof, a multimeter reading is a surefire way to determine whether or not you need a capacitor. If you’ve never done this before, we’ll break down how you can go about testing your capacitor!
Using a Multimeter to Test Your Ceiling Fan Capacitor
If you’re looking for a definitive way to determine whether or not your ceiling fan capacitor is faulty, then doing a test using a multimeter is the best way to check this. To do this, you’ll need to have a multimeter handy, which can be purchased online. If you’ve never tested a capacitor in this way before, you can use this handy YouTube video for additional guidance.
Step #1: Disconnect Power Supply Wires
The first step in testing your capacitor with a multimeter is disconnecting the wires that supply the power to the motor. To do this, you’ll need screwdrivers on hand. At this point, there’s no need to worry about the wires connecting the motor to the capacitor.
Step #2: Ensure Your Multimeter is Switched to Volts
In order to properly test your capacitor, you’ll need to ensure that your multimeter is switched to volts.
Step #3: Create a Parallel Circuit
The next thing you’ll want to do is connect the leads on the multimeter to the capacitor’s wires. You should hold these leads until the voltage meter reads zero before proceeding to the next step.
Step #4: Disconnect the Capacitor-to-Motor Wires
It’s now time to disconnect the wires that connect your capacitor to the motor.
Step #5: Ensure Your Multimeter is Switched to Ohms
At this point, you’ll want to switch your multimeter to the ohms setting in order to test your capacitor.
Step #6: Test Your Capacitor
To test your capacitor, place the leads from your multimeter on the capacitor’s wires that connect it to the motor. You’ll now want to wait a few seconds while the capacitor is charged by the leads. After a few seconds, these leads should be reversed.
Once you reverse these leads, please pay careful attention to the multimeter’s needle and whether or not it moves towards the infinite ohms side of the meter. If the meter moves towards infinite ohms, your capacitor is working. However, if the needle doesn’t move towards infinite ohms, your capacitor is faulty and needs to be replaced.
Conclusion
From the signs that your capacitor is faulty to actually testing it using a multimeter, we looked at everything you need to know about this important component of your ceiling fan. Having a working capacitor is essential to the optimal performance of a ceiling fan. Using our guidance, you’ll have a capacitor diagnosis in no time!